|
The Movie tool can be used to make spectacular movies of
any Starry Night view. Movies are played back using the
QuickTime viewer, so you can send Starry Night movies to
your friends and colleagues. They need not have Starry
Night.
Starry Night's Movie tool lets you record a graphically
intensive event (such as a planet flyby) and play it back as
a smooth QuickTime sequence.
To make a movie, select the Movie tool from the Tool
Palette. Drag the tool over the area of a Starry Night
window that you wish to make a movie of. As you drag, a
selection rectangle is formed, which we call the Movie Box.
During this process, the pixel length of the sides is
displayed, which is useful if you are designing your movie
to fit into a predetermined area. (Note: The minimum size
for a Movie Box is 101 pixels by 81 pixels).
Once you have sized your movie, release the mouse button.
A dialog box will appear asking what you would like to title
the movie, and where you would like to save it.
Movie controls
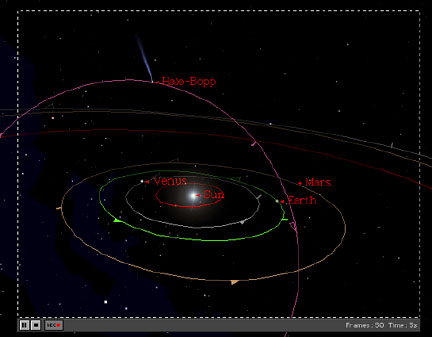
After you have named and saved the movie, the Movie Box's
controls appear. There are three Movie controls: the Pause
button, the Stop button, and the Record button.

The Pause button pauses the recording of
the movie. This enables you to adjust any time or
location information between frames.
The Stop button completes the recording
process, and closes the QuickTime window.
The Record button resumes the recording of a
movie after it has been paused.
You can also use the time buttons on the Time
Palette to stop and start the movie. If time is running,
the Movie Box will begin recording movement immediately. If
you'd like to tweak the view a bit, you can turn Time off
first (using the Time Palette) before using the Movie tool's
Pause button. You can then zoom, scroll, or grab your way to
the perfect shot before clicking on the Record button to
start your recording.
- Note: The Movie Box doesn't
record cursors, so you don't have to worry about getting
a "hand" in the shot.

When in Recording Mode, the Movie Box records a frame
every time the Starry Night window is updated. This means
that if your time step is set at 3 seconds, every time
Starry Night moves time ahead 3 seconds, one frame is
recorded. This frame information is displayed in the
right-hand corner of the Movie box's controls. In addition,
the total running time of the movie is also displayed. In
the above example, a total of 50 frames have been recorded,
and at the default setting of 10 frames per second, the
movie is currently 5 seconds long.
Starry Night also updates its windows if you are using
the Grabber tool or the scroll tools, so these movements
will become incorporated into your movies. You can also use
the Pause button to animate these movements. Click on the
button to pause the recording of a movie, scroll the view a
little, then continue recording by running time a step or
two. By repeating this a number of times, you can create
fantastic three-dimensional animations.
- Tip: Turn on Onscreen
info from the Guides
menu when making a movie if you want to show a running
log of location, view direction, or time.
- Note: A movie can quickly take
up a lot of space on your hard drive, so don't leave it
running too long.
Adjusting Recording Settings
By double clicking on the Movie tool, you can adjust
several aspects of the recording settings. Changing these
setting will affect the size or quality of your movies.
Compressor -- This popup lets you choose
one of several different compression formats. Depending
on the compression format chosen, a second popup menu may
allow you to choose from several color options.
Quality -- The slider lets you adjust the
quality of the recording.
Motion -- Within this box you can adjust frames
per second, key frames, and limit data rates.
Playing Back Your QuickTime movies
You can use any QuickTime movie player to play back
and/or edit your movies, such as MoviePlayer. To play back a
movie double click on it's icon in the folder where it was
saved.
|
